Interactive Tone Mapping
To start tonemapping an HDR file click on Update preview button in the tone mapping panel or use Ctrl+T.
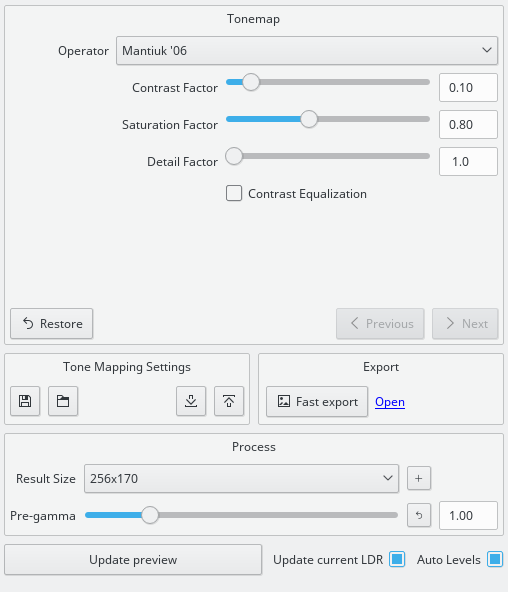
The tone mapping step first applies to the HDR the gamma value specified by the pregamma value, then the tone mapping operator is applied.
Adjusting pregamma is an optional step, so you can safely start with picking an operator. The available operators are listed in a combobox on top of Tone Mapping Panel. Most useful operators are listed first. The last two operators, Ashikhmin and Pattanaik, have less practical use for photography, but can be of interest for robotic vision specialists.
Having chosen the operator, tweak its settings, choose resulting size and click Update preview button in the bottom to tonemap an HDR image to an LDR image. Please see the “Tonemapping operators reference” chapter for details on using a particular operator.
To tonemap only a part of the HDR for a quick preview you can select a rectangle of the image using the mouse and click the Update preview button. Alternatively, you can click on the small preview images on the right panel. Because three of nine available operators (both Mantiuks and Fattal) are gradient domain operators that cannot provide consistent results on all result sizes by design, the preview function is not very accurate for those operators, so the selection method is preferred.
If you wish to compare several results with different settings, choose the View > Lock Viewers menu entry and use the navigation widget in the lower right corner of an image to pan around. Select another image and note that contents of every image tab will be synced.
Sometimes the tone mapped LDR image is either too bright or too dark. You can adjust brightness either setting the new Auto Levels feature available in the Tone Mapping Panel through a check box or using Levels dialog (Adjust Levels button in the toolbar) that works just like in GIMP, Krita, Photoshop or any similar raster graphics editor with the only exception that it works on luminance channel only.
If you have a lot of pictures shot in same lighting conditions or just wish to save current tone mapping settings for future use, you can save them to a text file or in a centralized database. Use the button on the left in the Tone Mapping Panel under Tone Mapping Settings for saving to a file or the small button on the right for saving in the database. You can then add a comment that describe your settings. Use the “Load” buttons to reload the previously saved settings.
The text file contains:
- the currently selected tone mapping operator and its related settings.
- the values of the pre-gamma settings.
Note
Please note that since version 1.8.4 the application (at the time named Qtpfsgui) uses a new file format which doesn’t contain the postgamma setting.